Interleaved 2 of 5 Barcodes with SQL Server Reporting Services SSRS -As Text
Barcodes in SSRS using BarCodeWiz Interleaved 2 of 5 Fonts
- This tutorial shows how you can add barcodes to SQL Server Reporting Services.
- Barcodes are encoded using text inserted into a table.
- Watch the video or follow the steps below.
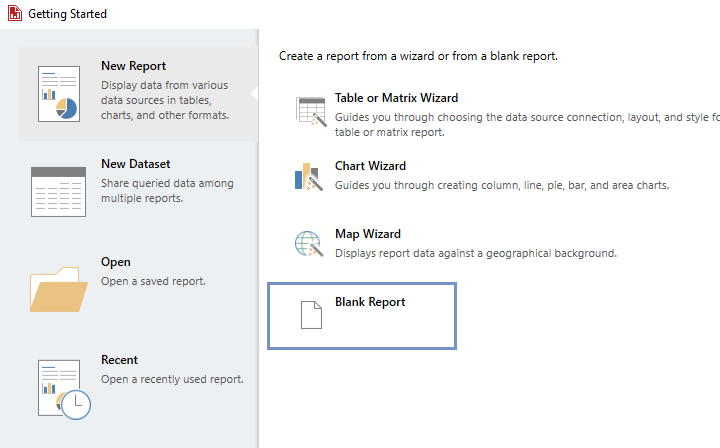
Step 1. Create a new Report
- Click on File > New > Blank Report
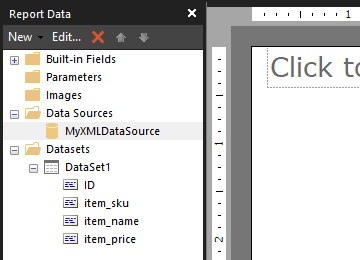
Step 2. Connect your Data Source.
- In this example, we are using a simple 3-column items data set.
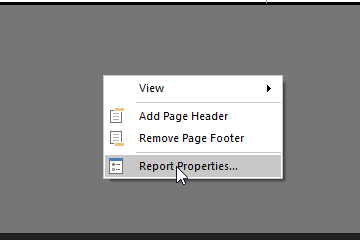
Step 3. Configure Report Properties
- Open Properties Window - right-click in the report background area and click Report Properties...
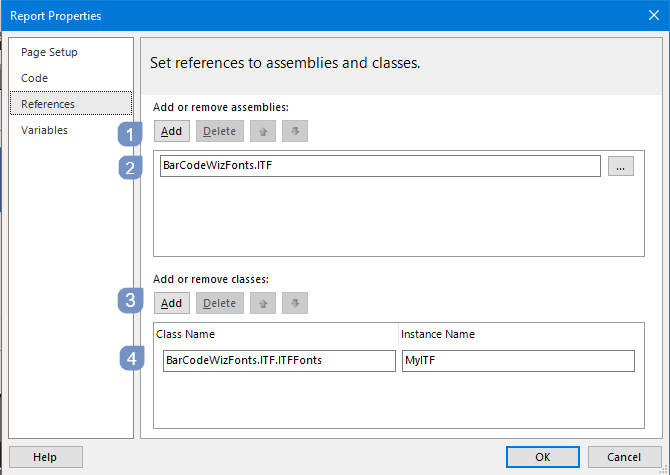
Add Reference:
- In the Report Properties window, select the References section.
- 1) Click Add to add the assembly.
- 2) Type: BarCodeWizFonts.ITF.
- 3) Click Add to add a class instance.
- 4) Type BarCodeWizFonts.ITF.ITFFonts for class name and MyITF for instance name.
Step 4. Insert a Text Box
- Insert a text box into the report by dragging one of the columns from your DataSet.
- In this example, the text box is placed inside a Table.

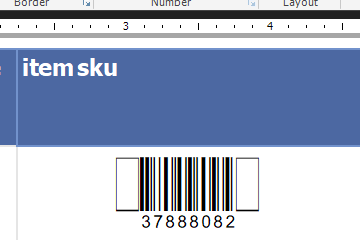
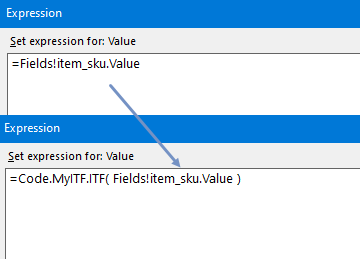
- Edit the expression as shown
- We are using the function ITF()
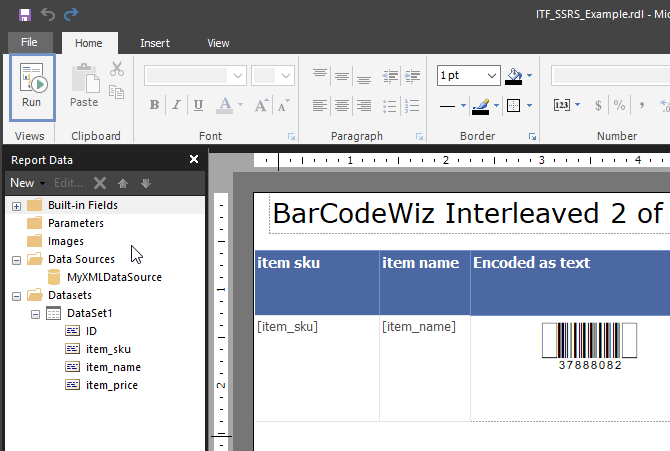
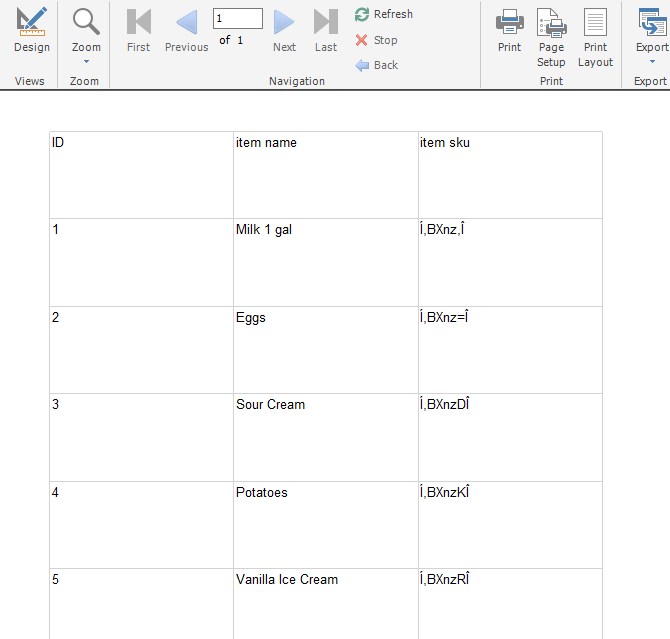
- Let's preview the report. It should look like this.:
Set Font Properties
- Set Font Name to: BCW_i25h_2
- Set Font Size to: 22

Step 5. Finalize and generate report
- Under the Home tab, in the Views section click Run to generate the report.