Barcodes in MS Publisher Mail Merge
Create Code 128 barcode labels in MS Publisher Mail Merge
- In this tutorial, we will show you how to create Code 128 barcodes in Publisher based on data from an Excel table.
- Follow the steps below, or watch the tutorial.
Step 1: Prepare Source of Data
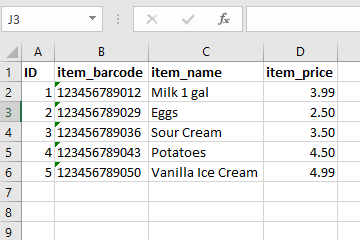
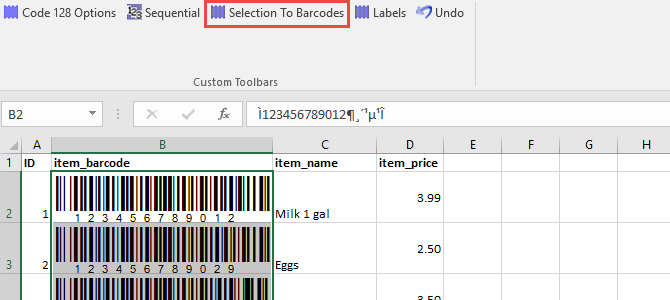
- In this example, we use a simple excel items table.
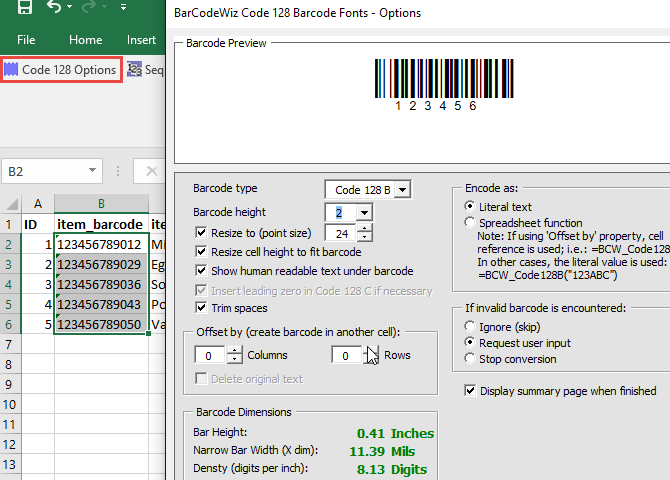
- Click on Code 128 Options under the Add-ins tab.
- Set the Barcode type to Code128B and click OK.
- Convert the barcode column of the items table using the Selection To Barcodes button in the Add-ins tab.
- Save the excel workbook.
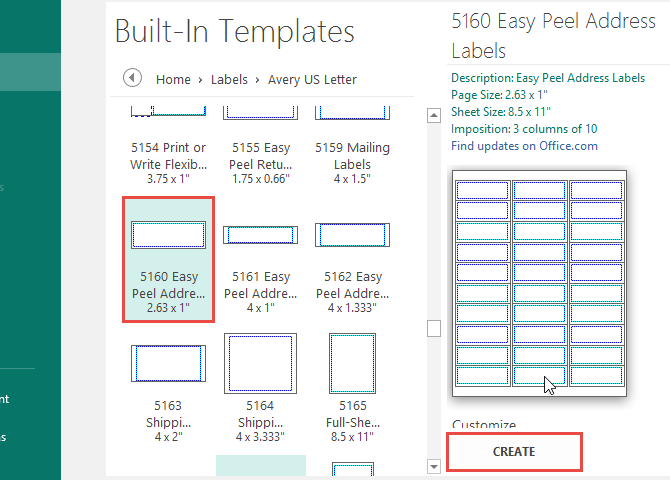
Step 2. Switch to Microsoft Publisher and select label format
- Select Avery 5160 as the template and click CREATE
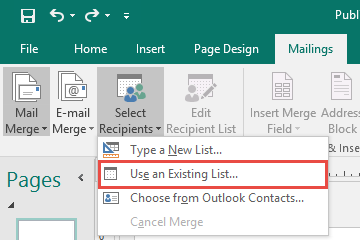
Step 3. Select data source
- Click on Select Recipients under the Mailings Tab, and select Use an Existing List.
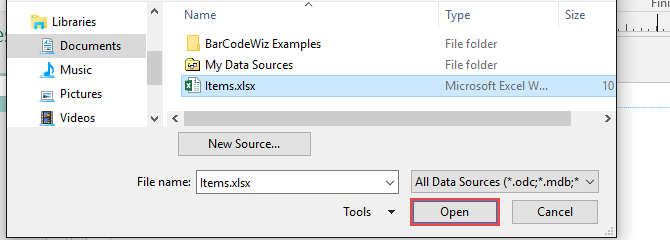
- Select the Excel file (Items.xlsx) file we prepared in Step 1 of this tutorial and click Open.
- Click OK with the worksheet selected.
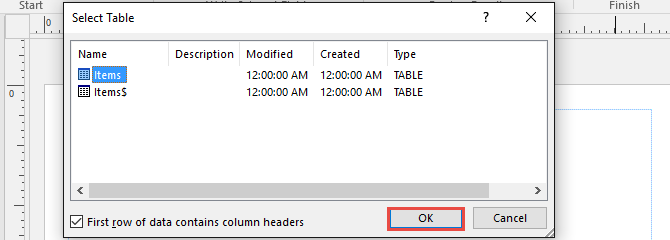
- Click OK again.

Step 4. Insert, resize, and position the fields.
- Under the Mailings tab, select Insert Merge Field and select our data fields.
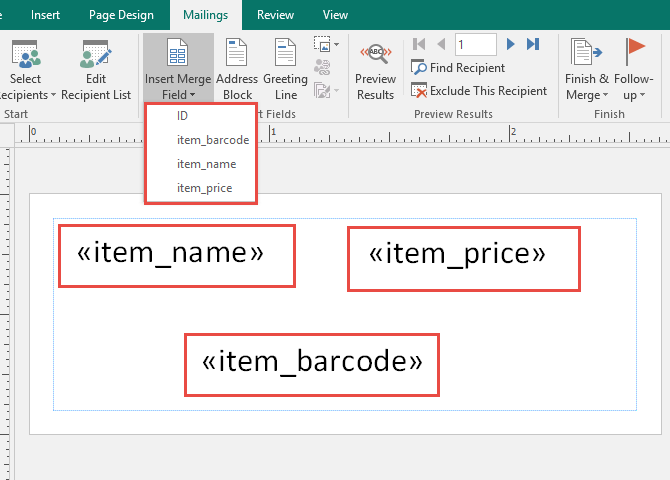
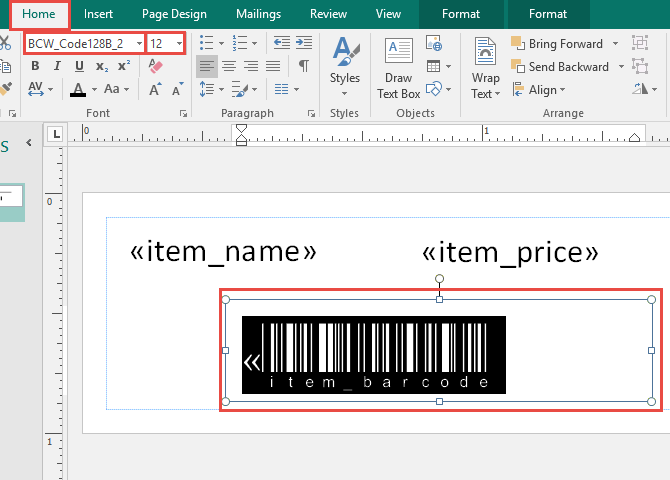
- Select the item_barcode field and change its font name and size.
- Note: the font name should be the same as the font originally used when preparing the barcode data in Excel.
- Note: The font point size alters the size of the barcode.
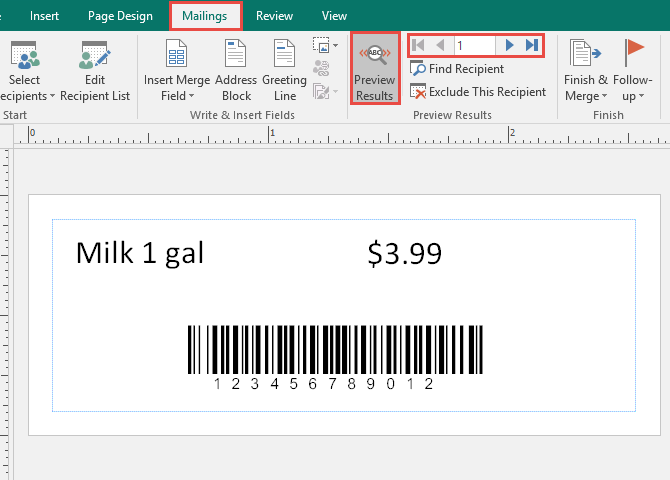
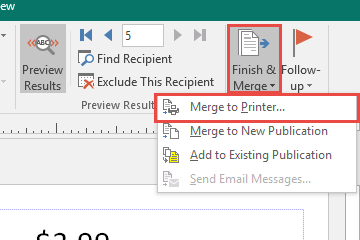
Step 5. Finalize and Preview
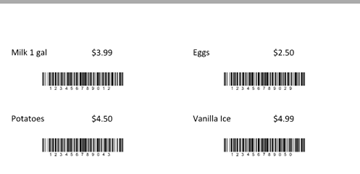
- Under the Mailings tab, select Preview Results to visually inspect that the barcodes.
The > arrow can be used to cycle through the items of the data source.
- Next, under the Mailings tab select Finish & Merge and click on Merge to Printer.
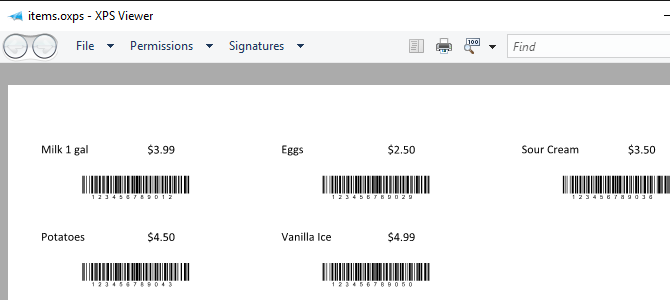
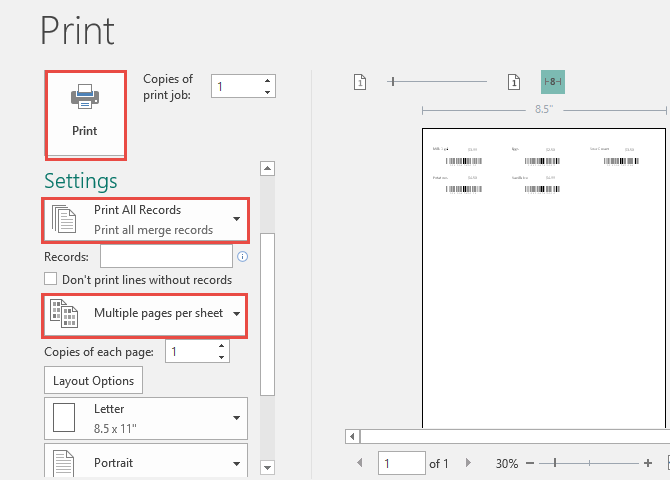
Step 6. Print the barcode labels
- Select desired print settings.
In this example we are simply printing all five barcodes from the items data source.
- The final result, using Printer XPS output.