Barcode Labels Wizard in MS Access
Create Barcode Labels using Microsoft Access Label Wizard
- This tutorial shows how to use the built-in Microsoft Access Label Wizard to create a page of UPC-A barcode labels
- Watch the video or follow the steps below
Before you begin - Import module with barcode functions.
- Click on Database Tools tab > Visual Basic (or press Alt + F11).
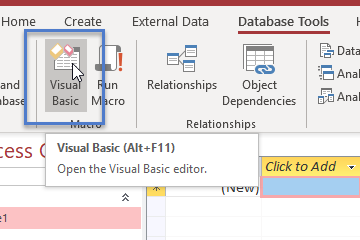
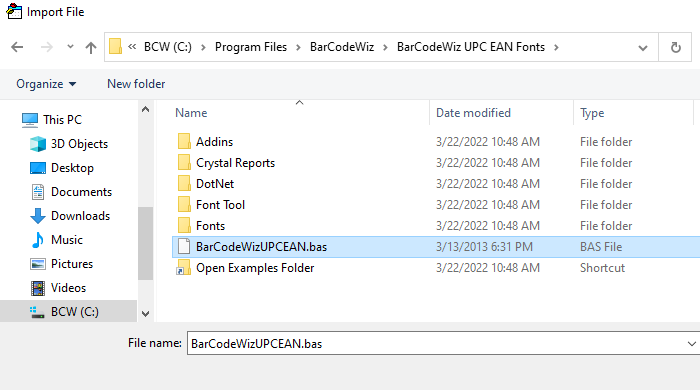
- Right-click on the database name and select "Import File"...
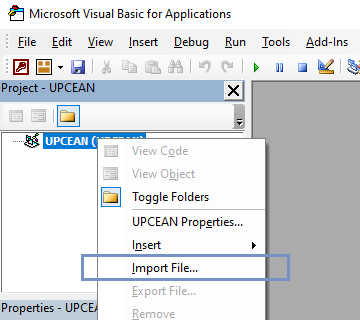
- Select BarCodeWizUPCEAN.bas.
- The default location of the file is:
C:\Program Files\BarCodeWiz\BarCodeWiz UPC EAN Fonts .
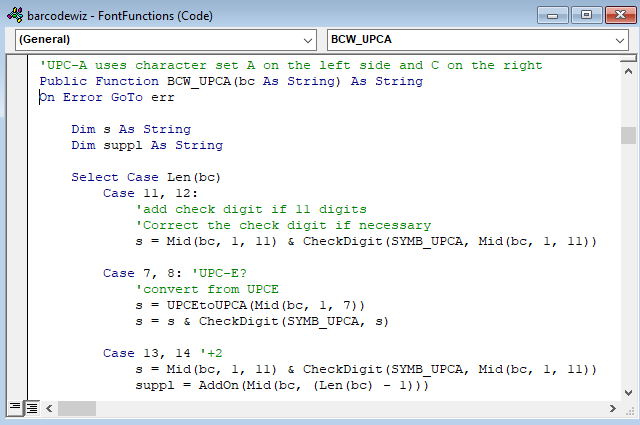
- The following module should now be part of the Access file.
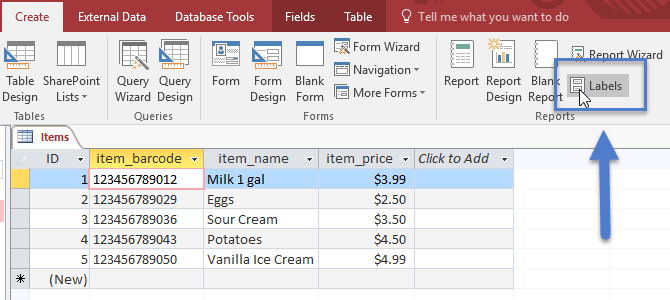
Step 1. Open Labels Wizard
- With your data table selected, click on Create > Labels.
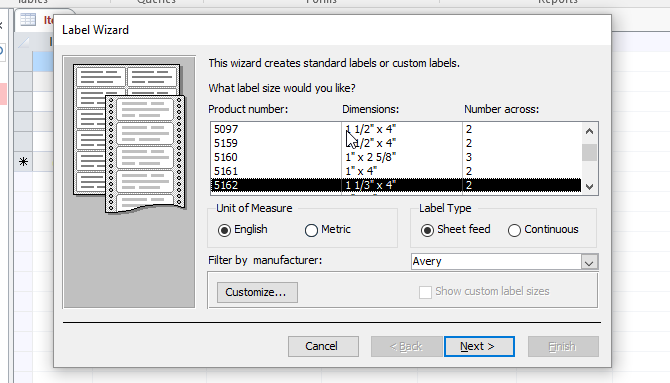
Step 2. Select Label
- Select the layout (we are using the Avery 5162) and click Next .
- Leave the default options selected and click Next.
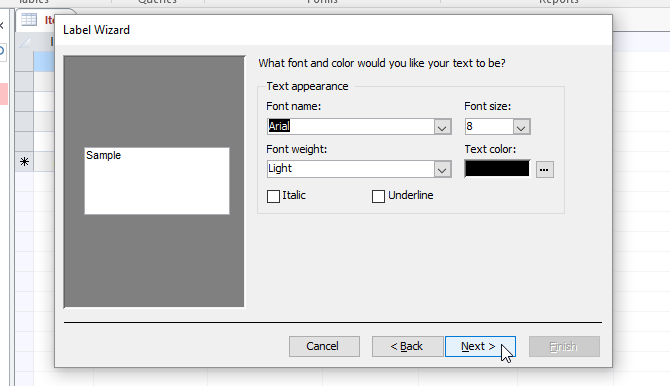
- Add the fields to the label.
- Important Note: Ensure the item_barcode field is in a line by itself by pressing the ENTER key.
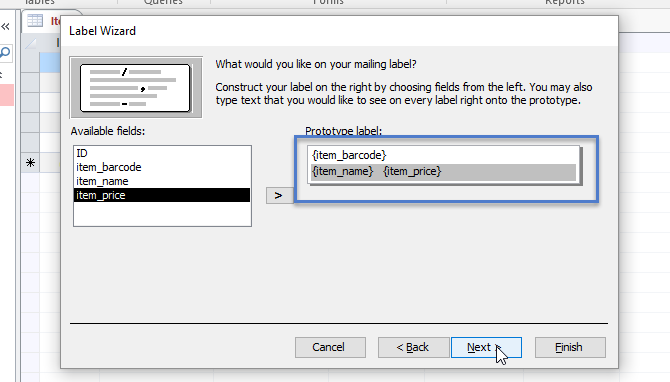
- Click Next
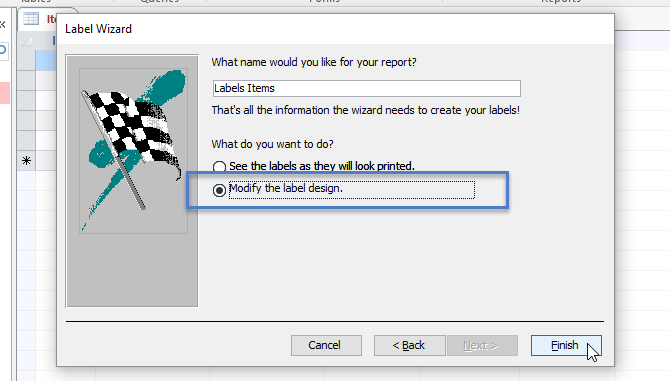
- Select Modify the label design and click Finish
Step 3. Edit Properties of Text Box
- With the text box selected, open its property sheet.
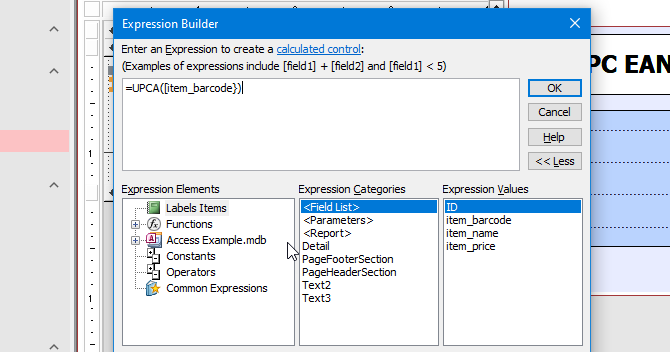
- Edit the Control Source property by clicking the ellipsis button (...)
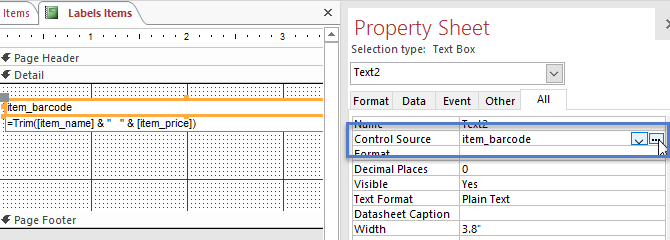
- Edit the expression as below.
- In this example, we are using BCW_UPCA function, =BCW_UPCA()
- The data column from our table is named item_barcode, therefore, the full expression is:
=BCW_UPCA([item_barcode]) - Click OK to close the Expression Builder.
- Set the font to one of BarCodeWiz UPCEAN fonts. We are using BCW_UPCEAN_2 font with size 24pt.
- Position the text boxes and resize to prevent text from being cut off.
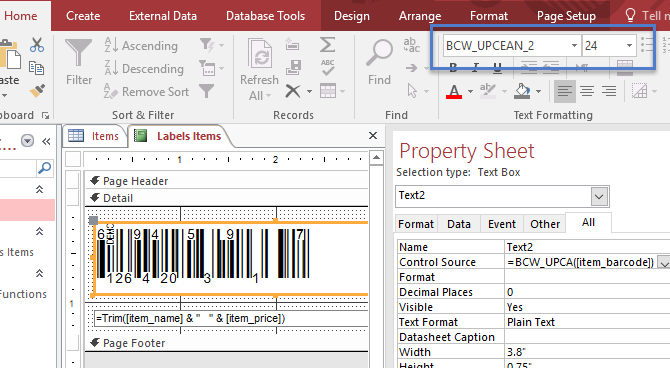
- Select the text boxes and press Ctrl+E to center align.
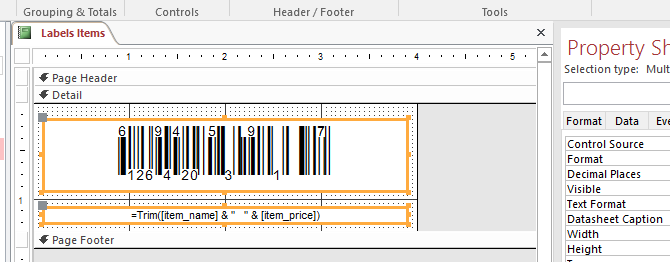
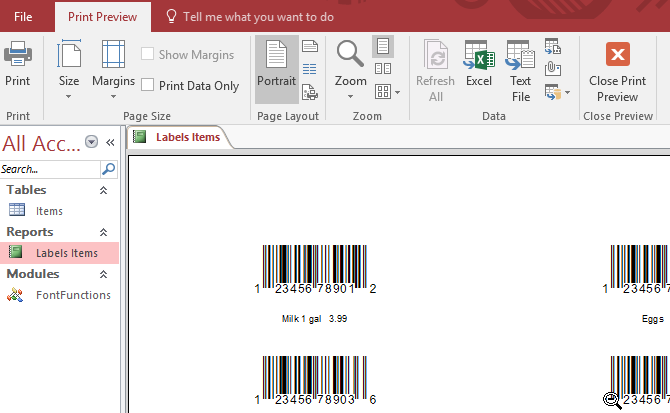
Ready!
- Completed Labels ready for Printing.