UPC EAN Barcodes in RDLC Reports
Generating Reports with UPC EAN Barcodes in Visual Studio
- This tutorial shows how you can add UPC EAN barcodes to Visual Studio RDLC Reports.
- Watch the video or follow the steps below.
Before You Begin...
- Make sure you've got Microsoft RDLC Report Designer installed.
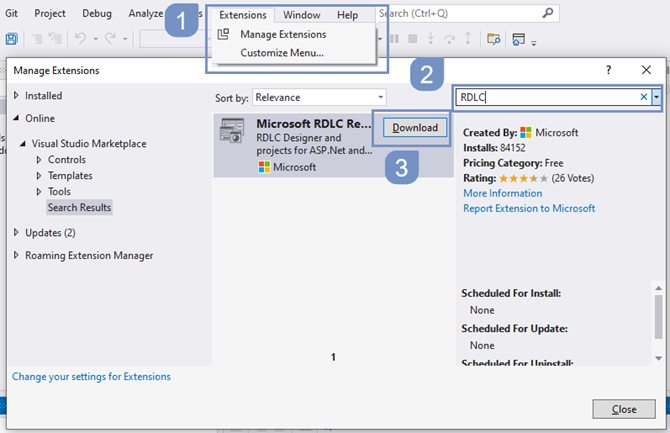
- (1) To install it, go to Extensions / Manage Extensions
- (2) Type RDLC in the search field
- (3) Click Download
- Proceed with installation.
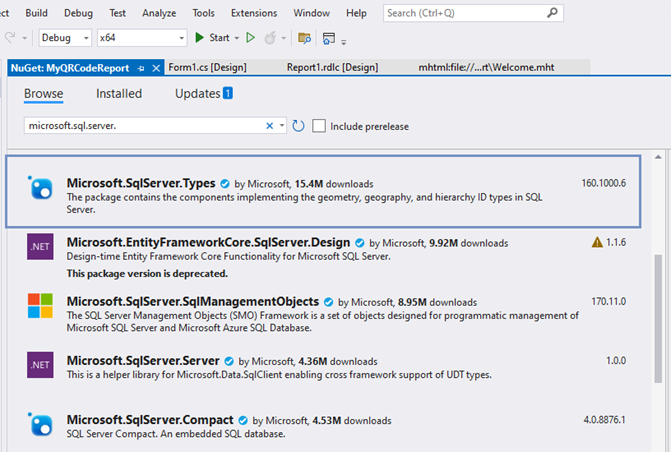
- Check if you have Microsoft.SqlServer.Types installed.
- Otherwise go to Project / Manage NuGet Packages...
- On the NuGet window search for Microsoft.SqlServer.Types
- Click on Install and follow the installation wizard
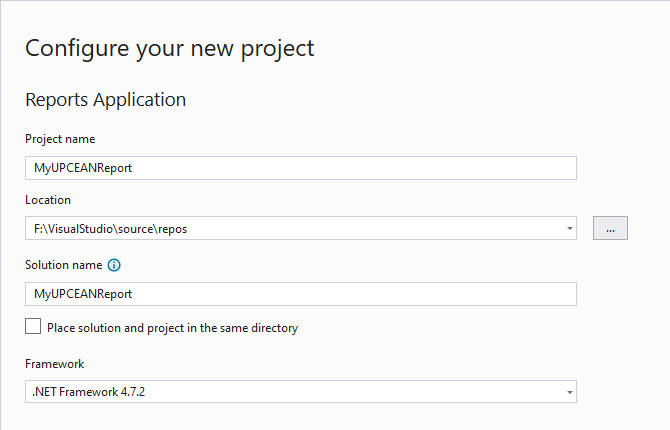
Step 1. Create a new Project
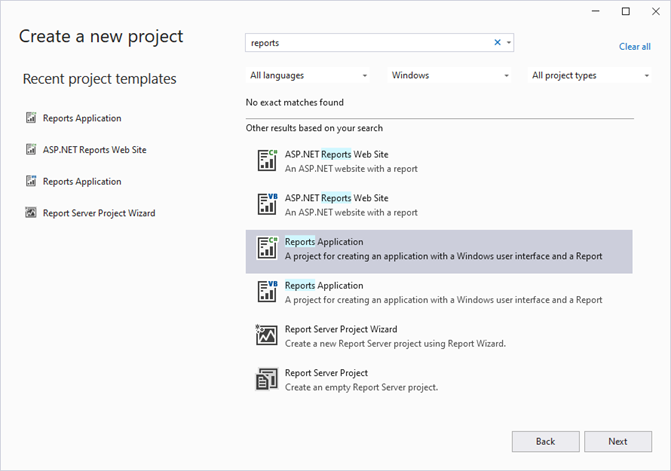
- In the main Visual Studio window, select Create a new Project
- Type Reports and select Reports Application (in our case C# project)
- Name your project
- Select the Framework that you plan to use
- Click on Create
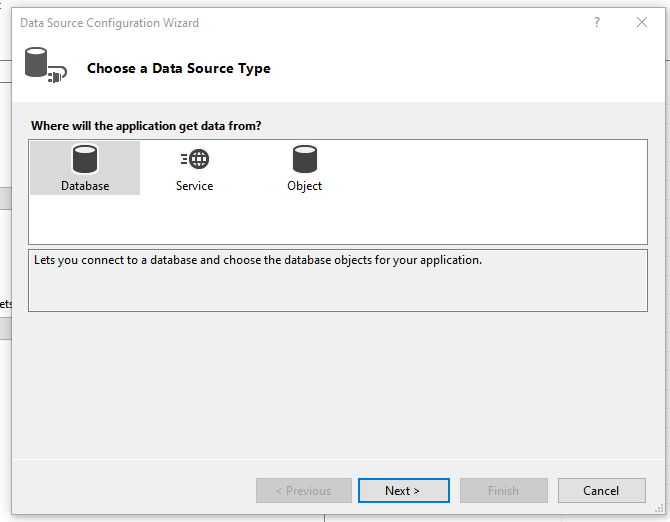
Step 2. Bind a Data Source
- Select the Data Source Type that you would like to use in your reports (in our case it will be Access Database )
- click on Next
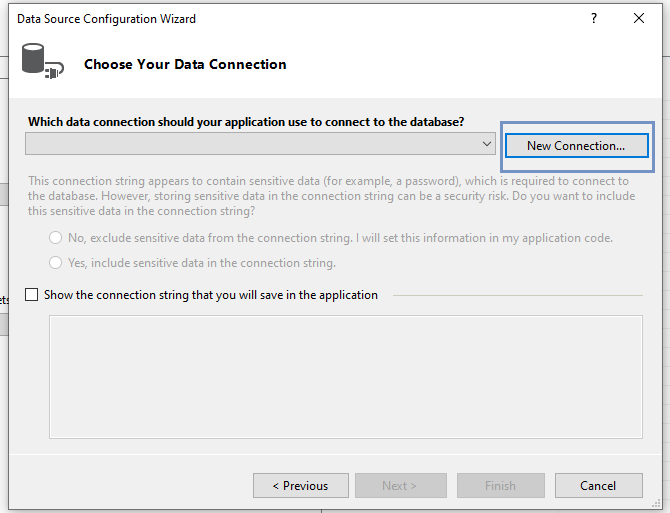
- Select Dataset for the database model and click Next

- Click on New Connection...
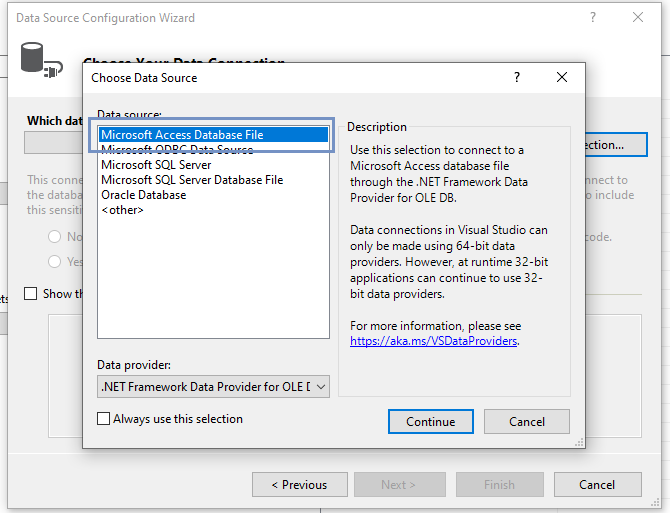
- On the Choose Data Source screen, select Microsoft Access Database File and click on Continue
- On the Add Connection screen click on Browse...
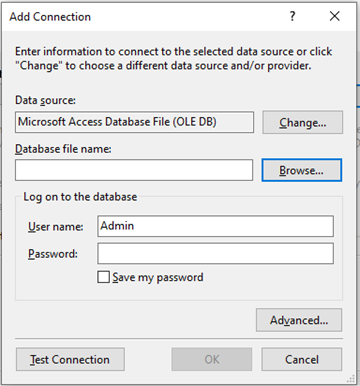
- On the Select Microsoft Access Database File screen, browse to the folder Documents\BarCodeWiz Examples\BarCodeWiz UPC EAN Fonts and select Access Example.mdb
- Click on Open
- On the Add Connection screen, click OK

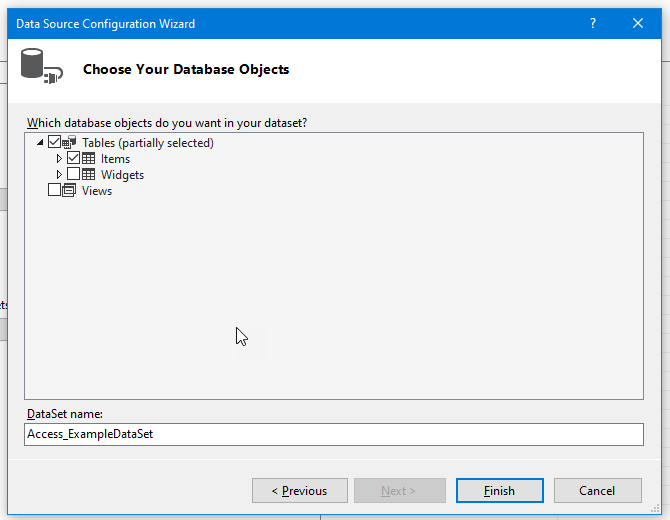
- Select Tables to use in the Report
- click on Finish
- Click on Next on the next screen (Dataset Properties)
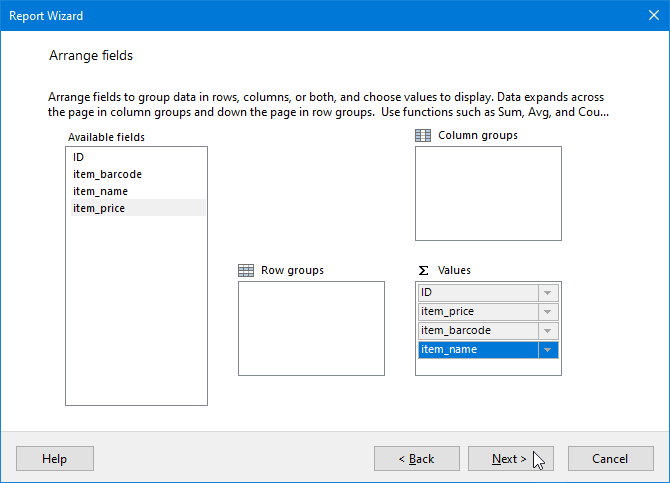
- Arrange fields for the report.
- In our case, we have placed all the fields in Values section without summarizing.
- Click on Next in the next screen (Choose the layout).
- Click on Finish on the screen named Preview.
Step 3. Setting up the Source of the Report's Definition
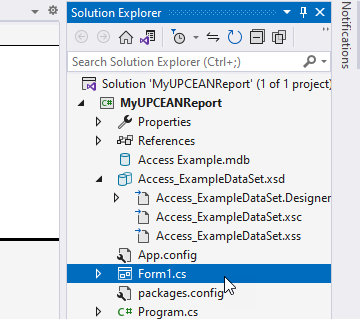
- Double - click Form1.cs in Solution Explorer
- Configure Data Sources:
- Bind your Report with Form1
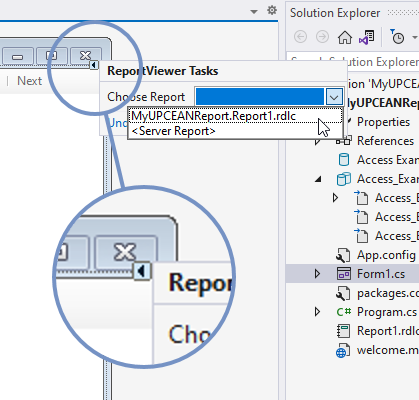
- Click on the tiny triangle just below the Close button
- Select MyUPCEANReport.report1.rdlc
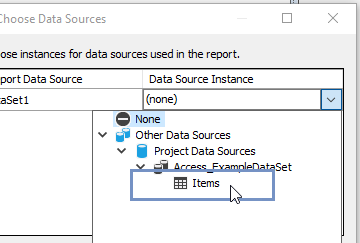
- Click on Choose Data Sources
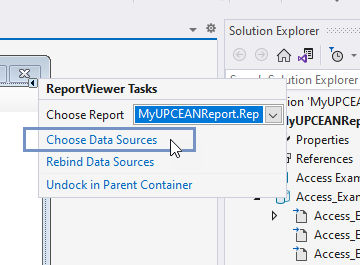
- Expand available sources and select the one you configured earlier.
- In our case - Items
Step 4. Changing the Project Platform to x64
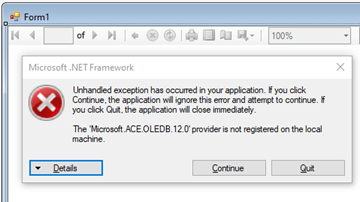
- If you Start your Project now, you would receive an error saying there is no OLEDB driver for ACCESS files on the machine.
- To prevent that, we have to switch the debug to x64 processors.
- Go to Configuration Manager...
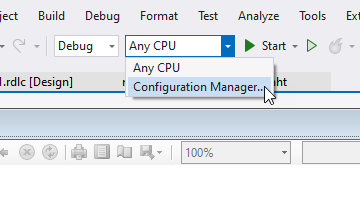
- (1) In Configuration Manager window, select New from the list under Platform
- (2) In New Project Platform, select x64
- Click OK and Close

Step 5. Add reference to BarCodeWizFonts.UPCEAN.dll
- In Solution Explorer right-click on References
- Select Add Reference...
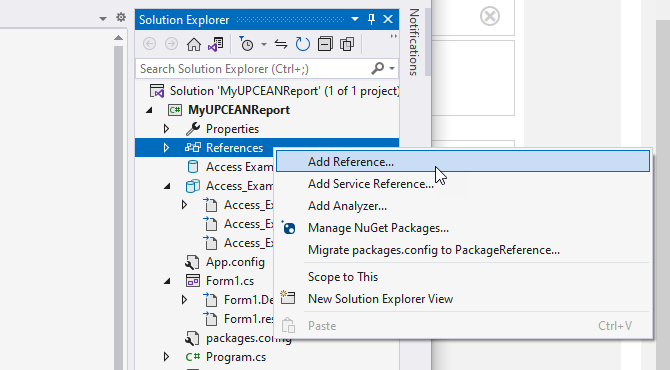
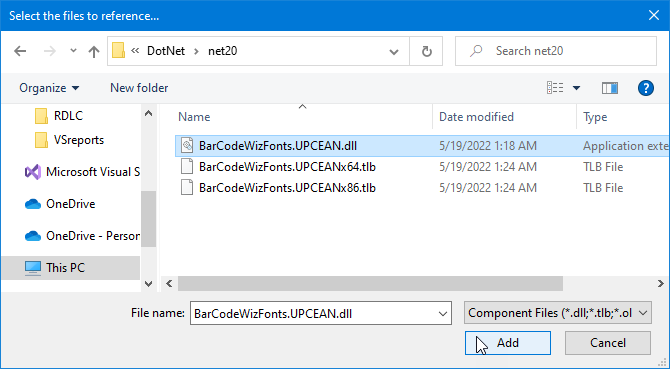
- In Reference Manager click on Browse.

- In the Select the files to reference window, browse to folder Program Files\BarCodeWiz\BarCodeWiz UPC EAN Fonts\DotNet\net20 and add the file BarCodeWizFonts.UPCEAN.dll
- Click OK in the Reference Manager window
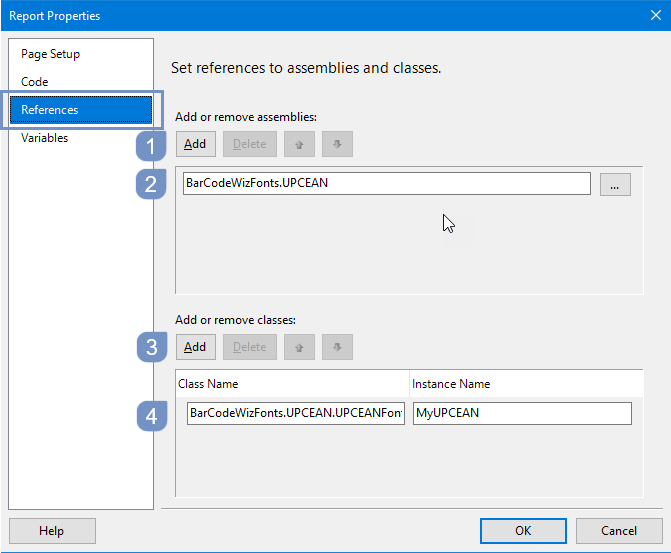
Step 6. Configure Report Properties
- Right-click on the empty area of Report1.rdlc and select Report Properties
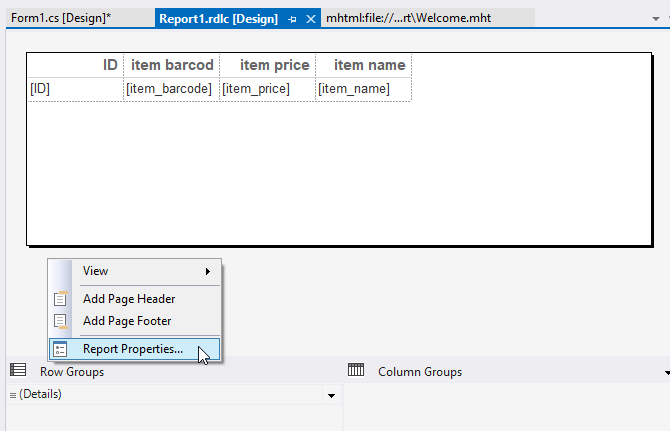
- In the Report Properties window, select the References section.
- 1) Click Add to add the assembly
- 2) Type: BarCodeWizFonts.UPCEAN
- 3) Click Add to add a class instance
- 4) Type BarCodeWizFonts.UPCEAN.UPCEANFonts for class name and MyUPCEAN for instance name.
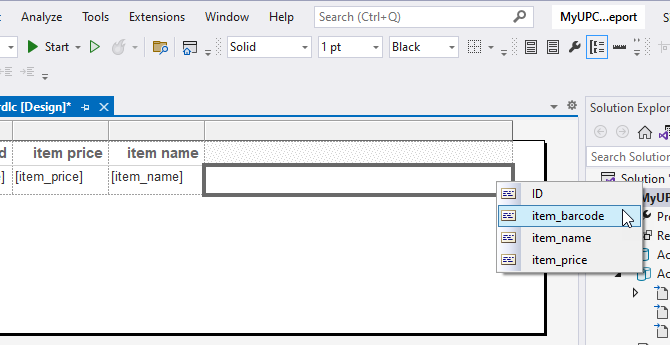
Step 7. Insert new columns with data to encode
- Right-click on the last column's header and select Insert Column - Right.
- In the new column, click in the upper-right corner and select the column with the data you wish to encode (in our case - item_barcode)
- Name the new column item barcode (EAN-13)
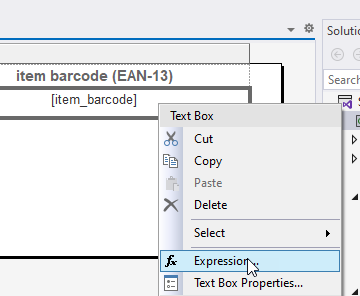
Step 8. Edit the Expression
- Right-click on the column with the data to encode (item_barcode) and select Expression
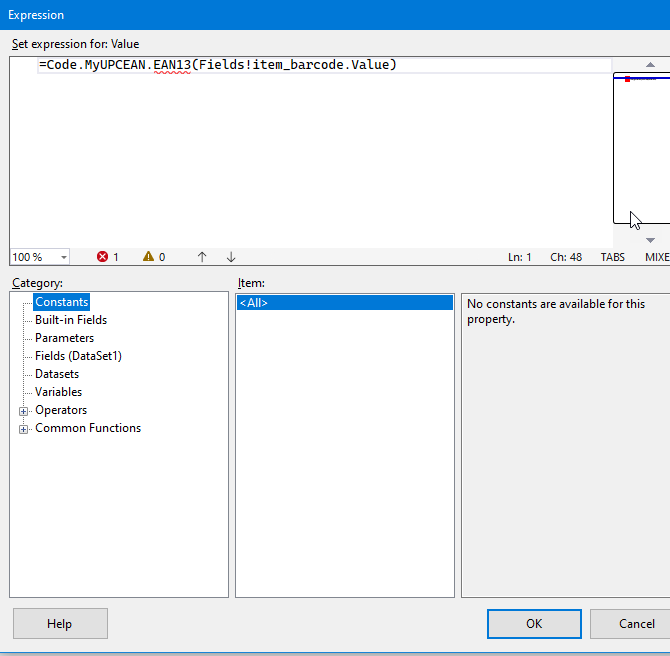
- Edit the Expression:
- For EAN-13: =Code.MyUPCEAN.EAN13(Fields!item_barcode.Value)
- Click OK
For a full list of UPC / EAN functions available to use see here.
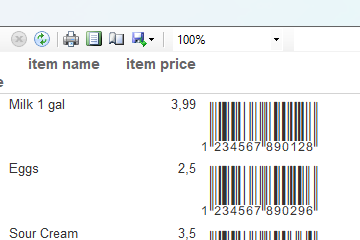
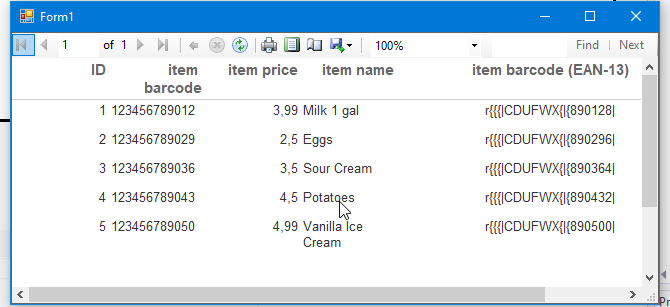
- Test your Report
- Click Start Without Debugging or press CTRL + F5
- You should see a report similar to the screenshot
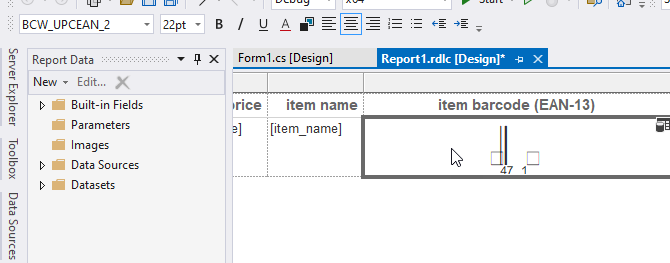
Step 9. Set the font
- Change the font to BCW_UPCEAN_2
- Set point size to 22
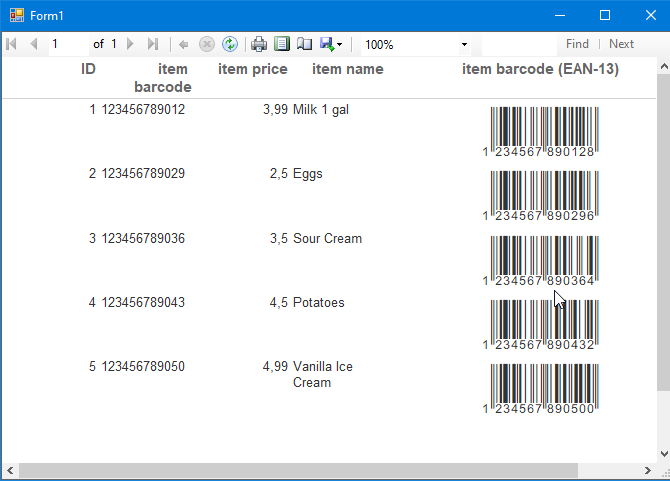
The Report is ready!
Click Start Without Debugging or press CTRL + F5 to preview it
UPC EAN Fonts Functions
UPCA(barcode as String)
- Encodes the barcode in UPC-A format.
- The function parameters are:
barcode: String value with the barcode data to encode. Must be 11 or 12 digits. Enter 11 digits to have the check digit added automatically. Also accepts 13, 14, 15, or 17 digits for +2 and +5 Add-on
UPCE(barcode as String)
- Encodes the barcode in UPC-E format.
- The function parameters are:
barcode: String value with the barcode data to encode. Must be 7 or 8 digits. Enter 7 digits to have the check digit added automatically. Also accepts 9,10, 12, or 13 digits for +2 and +5 Add-on
EAN13(barcode as String)
- Encodes the barcode in EAN-13 format.
- The function parameters are:
barcode: String value with the barcode data to encode. Must be 12 or 13 digits. Enter 12 digits to have the check digit added automatically. Also accepts 14, 15, 17, or 18 digits for +2 and +5 Add-on
EAN8(barcode as String)
- Encodes the barcode in EAN-8 format.
- The function parameters are:
barcode: String value with the barcode data to encode. Must be 7 or 8 digits. Enter 7 digits to have the check digit added automatically.
ToImageBytes(strText As String, fontName As String, Optional fontSize As Integer = 12, Optional dpi As Float = 96f, Optional imageType As String = "png") As Byte[]
- Converts text into the image as a byte array. May be used to return barcodes as images.
- The function parameters are:
strText: Text to be converted to image
fontName: Font to use for encoded text
fontSize: Font point size of the text
dpi: Dots per inch of resulting image. The default value is 96.0 (screen resolution)
imageType: Image format to return. Possible values are: png, gif, bmp, jpg