Barcode Labels in MS Access
Create Barcode Labels in Access
- Microsoft Access includes a built-in wizard for printing many common label layouts
- This tutorial shows how we can use it to create barcode labels
- Follow the steps below, or watch the video, to add barcodes to your own report

Step 1. Open the Labels Wizard
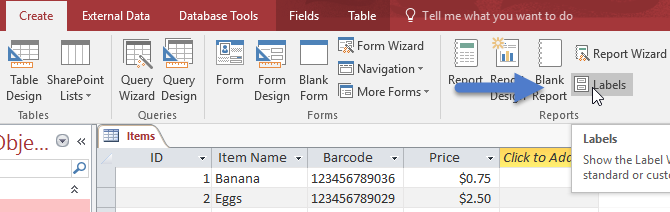
- In Object Browser, click on the data table you'd like to use for our barcodes. Our table here is named Items.
- Click on Create > Labels.
Step 2. Select the label layout and click Next.
- We are selecting Avery Label #8162 here.
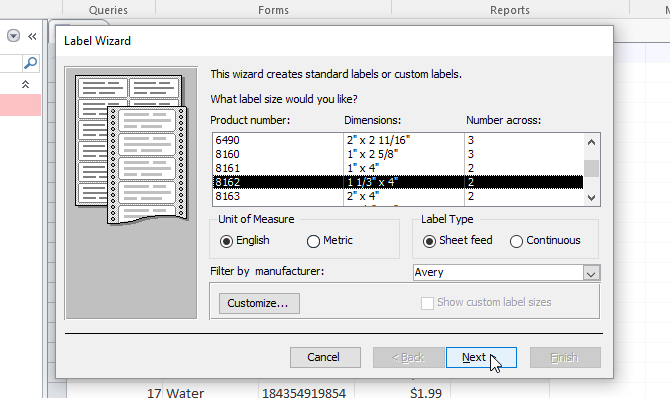
Step 3. Click Next.
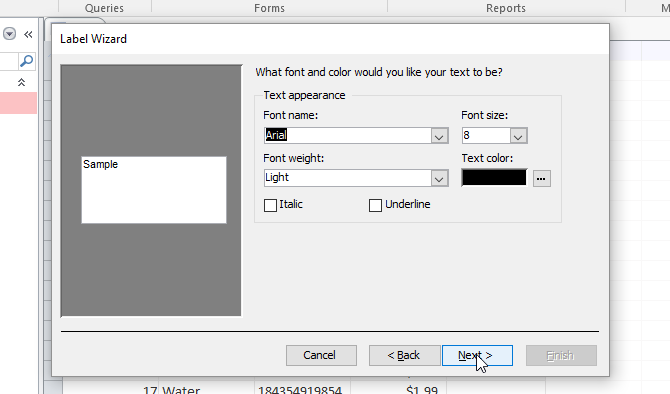
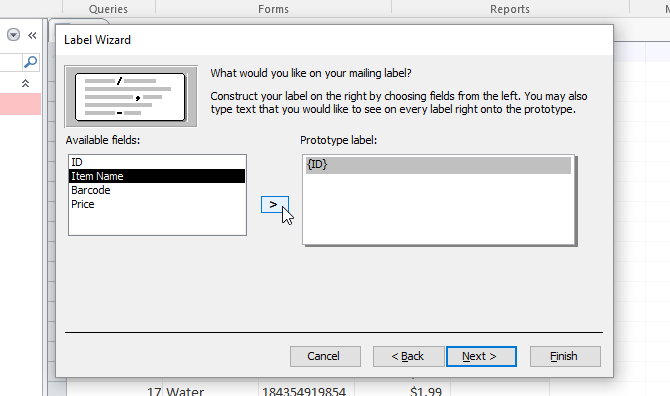
Step 4. Add one or more text fields to the label.
- Add any text field to the label (This is necessary to continue). We will remove it later.
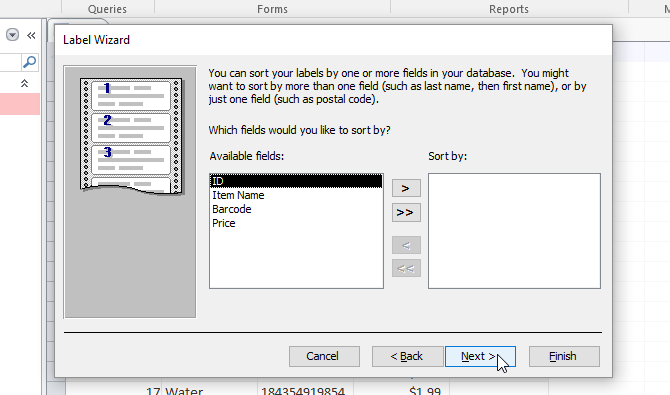
Step 5. (Optional) Select fields to sort by.
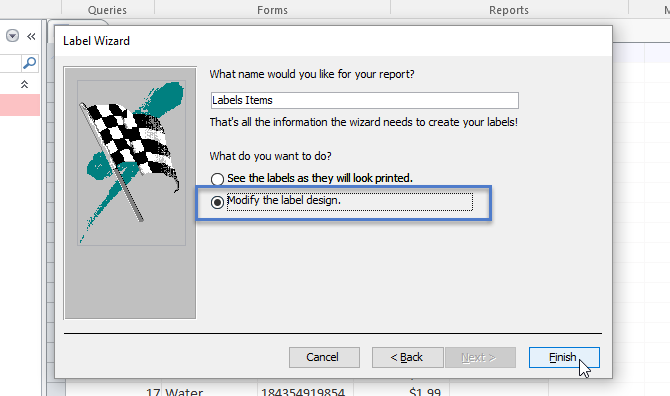
Step 6. Select Modify the label design and click Finish.
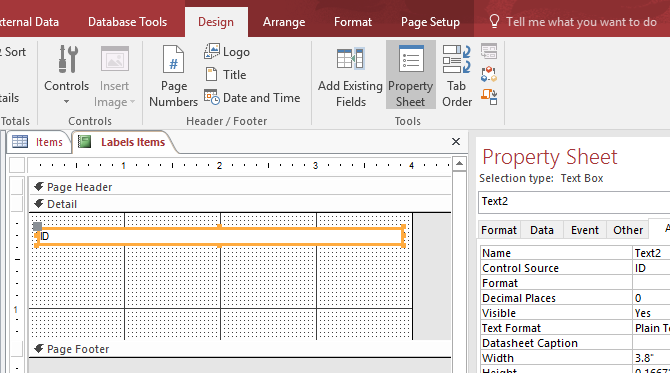
Step 6a. Our label so far.
- You may now delete the field(s) we added in Step 4. To do that, select the text box and press delete.
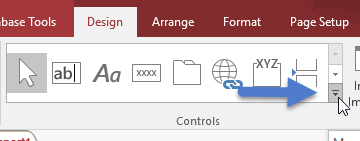
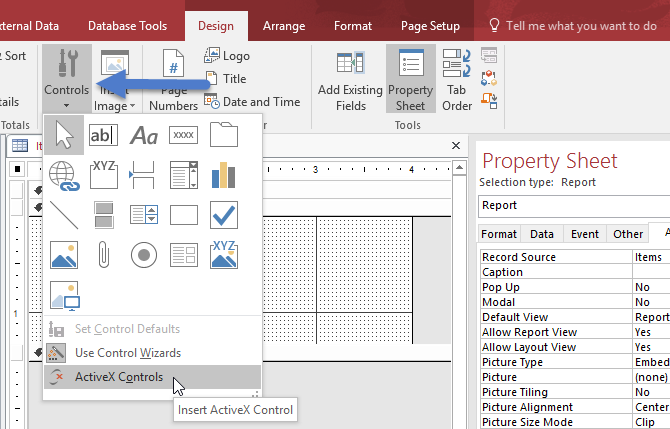
Step 7. Add BarCodeWiz to the Report
- You might see one of two options, depending on size of your MS Access window:
- Option A: Click Design Tab > DOWN Arrow > ActiveX Controls
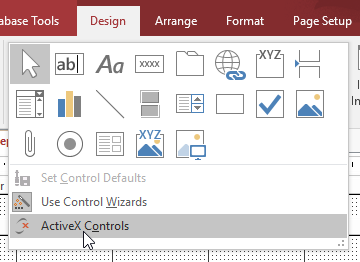
- Option B: Click Design Tab > Controls > ActiveX Controls
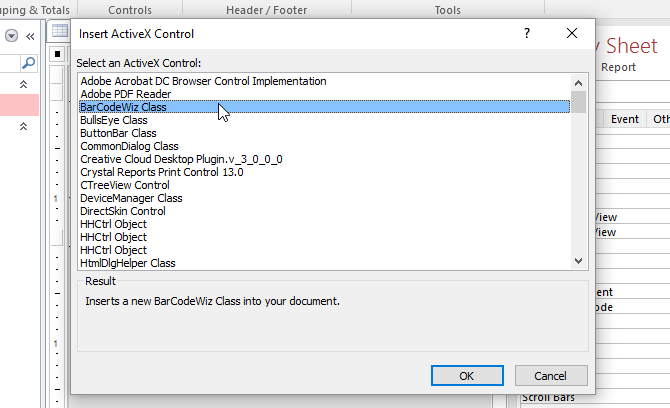
- Select BarCodeWiz Class, and click OK
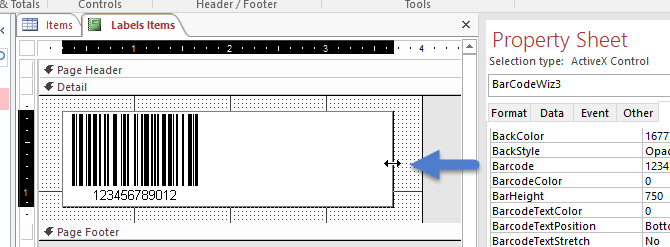
Step 8. Ensure barcode is not cut off
- This step is necessary to prevent unreadable barcodes. It ensures the barcodes are not cut off if the barcode expands past the edges of the control.
- Resize the control to make it as wide as possible (this depends on your data).
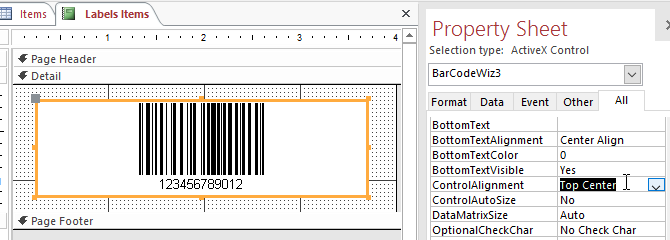
Step 9. Center the barcode if desired
- Set ControlAlignment to Top Center.
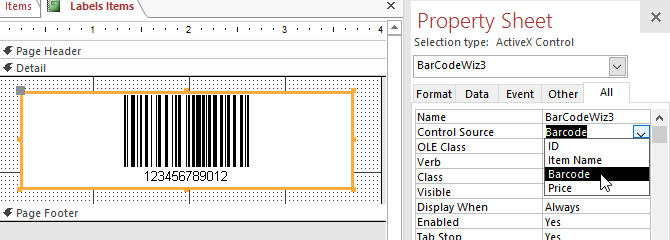
Step 10. Update Control Source of BarCodeWiz
- In the Property Sheet, select BarCodeWiz.
- Change the Control Source to Barcode (the name of the column with barcode data in our table).
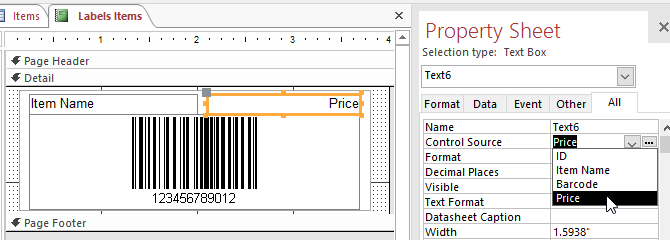
Step 11. Optional: Insert additional controls into the report.
- Here we added two text boxes and a rectangle around the fields.
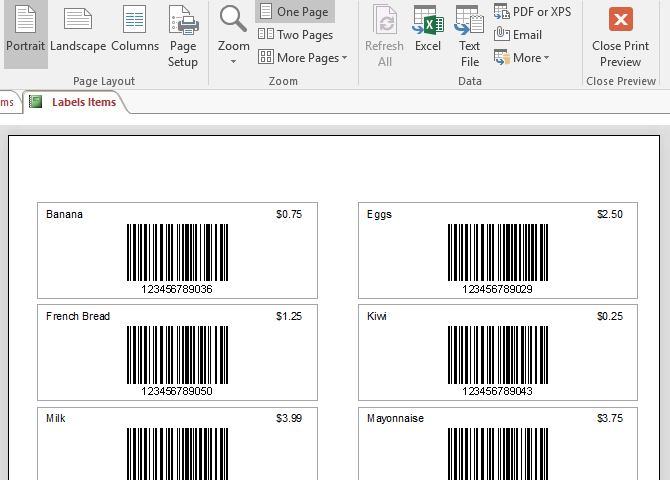
Ready!
- Click on Print Preview or Print to see your report.
- If you see the error Some data may not be displayed, simply ignore it.

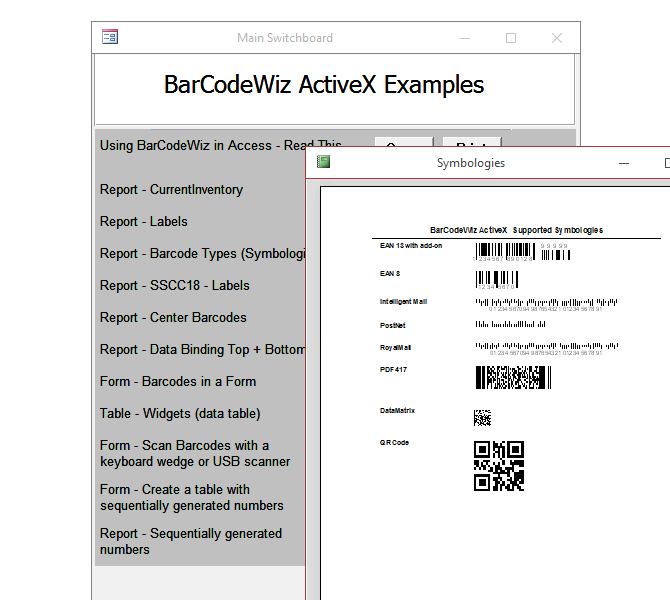
Want to see more Access examples with barcodes?
- BarCodeWiz ActiveX comes with a number of Access examples. See:
Documents\BarCodeWiz Examples\Barcode ActiveX Control\barcodewiz.mdb