-
-
- Install Barcode ActiveX Add-in in Excel
- Barcodes in MS Excel
- Create Sequential Barcode Labels in Excel
- Add Supplemental Text to Barcodes in Excel
- Extract Barcode Images from MS Excel
- Create Dynamic Barcodes Using LinkedCell in Excel
- Supplemental Text in Barcodes Using LinkedCell in Excel
- Barcodes in Excel with VBA
-
-
- BackColor
- BackStyle
- Barcode
- BarcodeColor
- BarcodeTextColor
- BarcodeTextFont
- BarcodeTextVisible
- BarcodeTextPosition
- BarcodeTextStretch
- BarHeight
- BearerBars
- BottomText
- BottomTextAlignment
- BottomTextColor
- BottomTextFont
- BottomTextVisible
- ControlAlignment
- ControlAutosize
- DataMatrixSize
- LinkedCell
- OptionalCheckChar
- Orientation
- OutlineColor
- OutlineStyle
- OutlineVisible
- OutlineWidth
- Padding Left/Top/Right/Bottom
- PDF417Columns
- PDF417ErrorCorrectionLevel
- PDF417RowHeight
- PDF417Truncated
- Picture
- QRCodeErrorCorrectionLevel
- QRCodeSize
- QuietZone Horizontal/Vertical
- Symbology
- TopText
- TopTextAlignment
- TopTextColor
- TopTextFont
- TopTextVisible
- UnitOfMeasure
- VerticalBarTextEntry
- WideToNarrowRatio
- XDimension
-
Barcode ActiveX Control
Supplemental Text in Barcodes Using LinkedCell in Excel
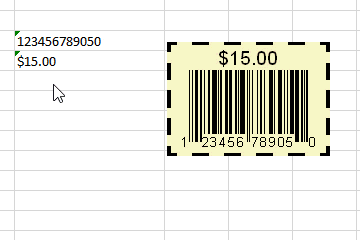
- This tutorial shows how to add text above and below the barcode. The values come from three different cells in the sheet. The barcode updates automatically when these cells change.
- We accomplish this using LinkedCell and VerticalBarTextEntry properties.
- See the previous tutorial for basics on dynamic barcodes in Excel.
Step 1. Setup
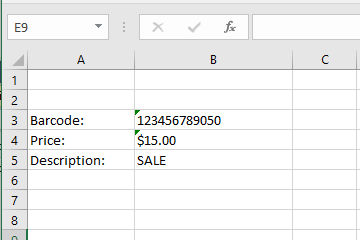
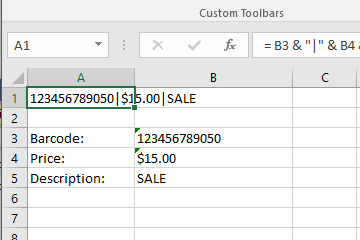
- In this example, our barcode value is in cell B3. Supplemental text is in cells B4 and B5.
Step 2. Combine into One Cell
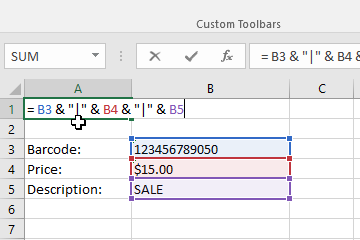
- Our data must be in the following format:
BARCODE|Top Text|Bottom Text - To do that, we enter this formula in cell A1:
= B3 & "|" & B4 & "|" & B5
- The Result:
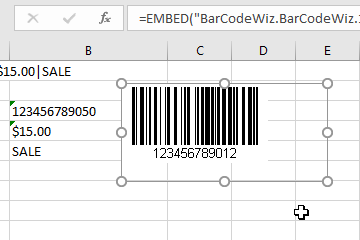
Step 3. Insert ActiveX Control
- Click on Developer tab > Insert > ActiveX Controls > More Controls > BarCodeWiz Class
- See the previous LinkedCell tutorial on more information on how to insert the control.
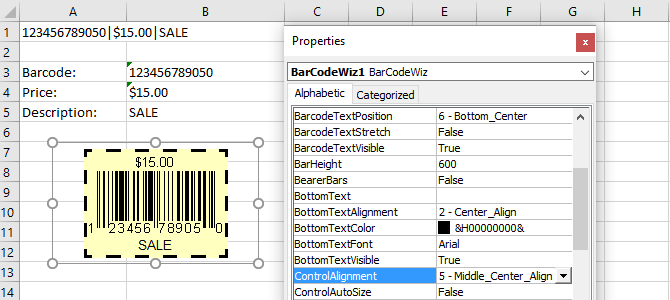
Step 4. Set Properties of the Control
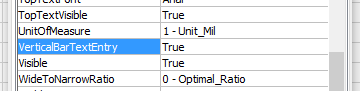
- Set VerticalBarTextEntry to True
- Set LinkedCell to A1

Step 5. Position the Control and Set Other Properties
- BackColor: &H00C0FFFF& (Yellow)
- Symbology: UPC_A
- ControlAlignment: Middle_Center_Align
- OutlineStyle: Dash_Outline
- OutlineVisible: True
- OutlineWidth: 30